

The “I Can Fix That” Moment of Dread
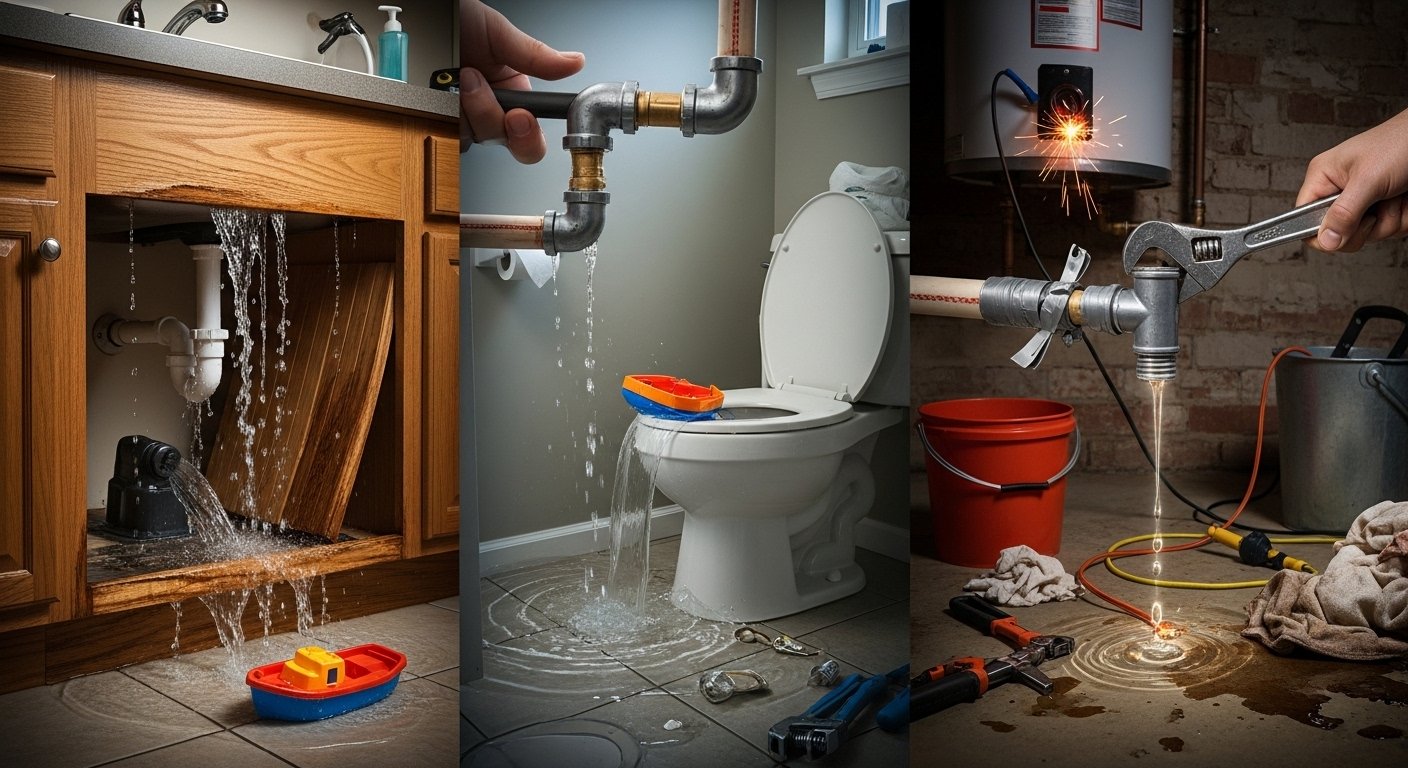
We’ve all been there. You’re standing in the kitchen, and you notice a tiny drip under the sink. You think, “Honestly, how hard can it be?” You grab the wrench, head to the hardware store, and spend forty-five minutes looking for a washer that probably doesn’t exist anymore. You get back, tighten a few things, and feel like a total hero… until three hours later when you hear the sound of a literal waterfall hitting your floorboards.
It’s that sinking feeling (pun very much intended) where a $10 DIY fix turns into a $2,000 “call the professional at midnight” emergency.
Don’t get me wrong—I love a good DIY project. There’s something deeply satisfying about fixing your own home. But plumbing is one of those areas where the margin for error is paper-thin. Water is a patient destroyer; it find every tiny gap you leave behind. If you’re currently knee-deep in a project that went south, you might need our emergency plumbing services right now. But if you’re just planning your next weekend project, let’s talk about how to avoid the 5 common plumbing mistakes that turn simple repairs into disasters.
Why “Good Enough” Isn’t Good Enough with Pipes
Plumbing isn’t just about moving water from point A to point B. It’s a delicate balance of pressure, gravity, and chemical reactions. When we dive into a DIY repair without respecting those forces, the impact is usually delayed. You won’t know you messed up the moment you turn the water back on. You’ll know three weeks later when mold starts growing behind your vanity or your subfloor starts to soft-rot.
The emotional toll is real, too. There is nothing that ruins a family dinner faster than a toilet that won’t stop overflowing because of a “quick fix” on the flapper. We want our homes to be our sanctuary, not a source of constant anxiety.
The Root of the Problem: Why We Mess Up
Usually, these mistakes don’t come from a lack of effort. They come from a few common misconceptions:
- The “Tighter is Better” Fallacy: We think if we just crank that nut a little harder, it’ll never leak. In reality, you’re probably cracking the seal or stripping the threads.
- Assuming All Pipes Are the Same: Mixing metal types (like copper and galvanized steel) creates a chemical reaction called electrolysis that eats your pipes from the inside out.
- Over-reliance on Chemicals: We’ve been told that a bottle of blue liquid fixes everything. Most of the time, it just makes the problem worse (and more dangerous).
5 Common Plumbing Mistakes to Watch Out For
Let’s break these down so you can spot them before you’re holding a bucket and crying.
1. Using Too Much Force
This is the #1 mistake I see. You’re working on a faucet repair and the connection feels a little loose, so you give it one more giant turn with the pipe wrench. Snap. Plumbing fixtures are often made of soft metals or even plastic. If you overtighten a supply line or a nut, you can easily crack the housing or strip the threads. Once that happens, the part is garbage. The Solution: Hand-tighten connections first, then give them just a quarter-turn more with a wrench. If it drips, tighten a tiny bit more. Don’t go for the “Hulk” grip.
2. The “Flushable” Wipe Trap
I know the package says they’re flushable. The marketing is great. But look, as someone who has seen the inside of more sewer lines than I’d like to admit, they are not flushable. They don’t break down like toilet paper. They stay whole and act like a net, catching everything else that goes down the line. The Solution: If it’s not toilet paper or something that came out of your body, it goes in the trash. This single rule will save you from most drain cleaning calls.
3. Relying on Chemical Drain Cleaners
When a sink is slow, the easiest thing is to dump a bottle of caustic liquid down there. Here’s the problem: those chemicals generate heat to melt clogs. If you have older pipes (or even PVC), that heat can warp the pipes or eat through the seals. Plus, if the chemical doesn’t clear the clog, you now have a sink full of toxic acid that a plumber has to deal with. The Solution: Use a plunger or a hand-cranked drain snake. It’s more work, but it actually removes the blockage without melting your house.
4. Forgetting to Turn Off the Water
It sounds like a joke, but you’d be surprised how many people start a toilet repair and realize halfway through that the shut-off valve is stuck. Or worse, they don’t even look for the valve. The Solution: Always test your shut-off valves before you take anything apart. If the local valve doesn’t work, make sure you know exactly where the main water shut-off is for your entire house.
5. Using the Wrong Tools
Using a pair of pliers when you need a basin wrench or a pipe cutter is a recipe for stripped bolts and jagged edges. I’ve seen people try to cut a pipe with a hacksaw and end up with a cut so crooked that no fitting could ever seal it. The Solution: If you don’t have the right tool, go buy it or rent it. Or, honestly, if the tool costs more than the repair, that’s your sign to call a pro.
Actionable Tips for a Successful DIY
If you’re determined to handle it yourself, here’s how to set yourself up for success:
- Take a “Before” Picture: Before you take anything apart, snap a photo. You’ll be glad you did when you’re trying to remember which washer went where.
- Buy Extra Parts: If you think you need one 5/8″ fitting, buy two. And maybe the size up and down just in case. You can always return what you don’t use, and it beats three trips to the store in the middle of the job.
- Use Thread Tape (The Right Way): Wrap your Teflon tape clockwise around the threads. If you wrap it the wrong way, the tape will just unspool when you screw the pipe on.
- Know Your Limits: If the project involves the main sewer line or anything behind a wall, think twice. Those aren’t “YouTube-university” level repairs.
- Clean the Area: Before you put a new part on, wipe down the old pipes. Grit and old plumber’s putty are the enemies of a good seal.
FAQ: Your Quick DIY Gut-Check
Q: How do I know if I’ve overtightened a connection? A: If you feel the resistance suddenly “give” or get easier while you’re tightening, you’ve likely stripped the threads or cracked the fitting. Back it off and inspect for damage immediately.
Q: Is it okay to mix PVC and copper pipes? A: Yes, but you need the correct transition fittings. You can’t just glue them together.
Q: Why does my sink still smell after I cleared the clog? A: You probably have buildup in the P-trap (that U-shaped pipe under the sink). You’ll need to take it off and give it a good scrubbing. Just remember to put a bucket underneath first!
Q: Can I use a regular snake for a toilet clog? A: No! A standard drain snake can scratch the porcelain of your toilet. You need a “toilet auger” which has a protective sleeve.
Wrapping Up: Respect the Drip
Look, I’m rooting for you. There is nothing like the pride of fixing your own home. But part of being a great DIYer is knowing when a job is over your head. Plumbing is tricky, and mistakes are expensive.
If you find yourself staring at a pile of parts and a puddle of water, don’t beat yourself up. It happens to the best of us. Whether you need a simple pipe repair or a full system check, we’re always here to help you get things flowing correctly again.
Stay dry, keep your wrenches handy, and remember: if it feels like you’re forcing it, you probably are.

Comments are closed