


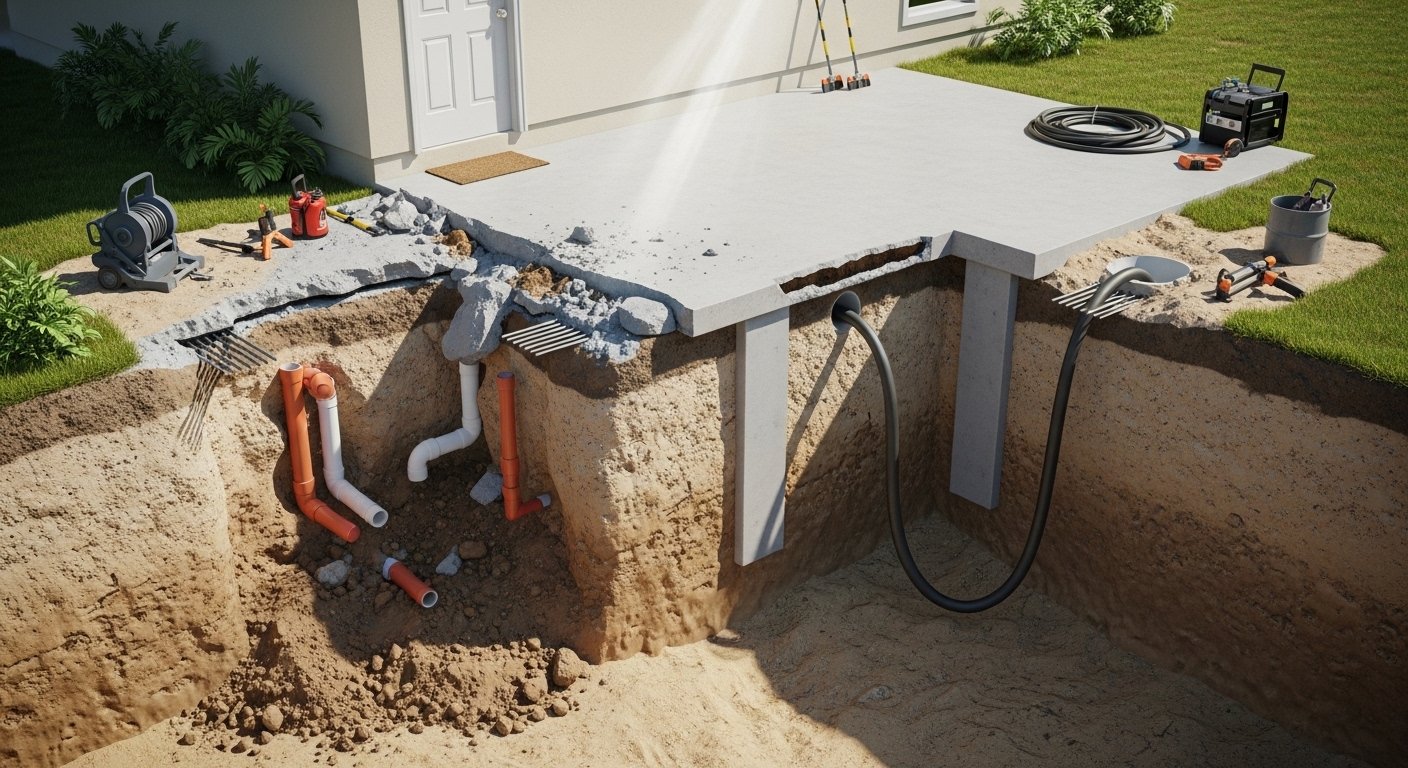
Trenchless Pipe Repair: Fix Slab Leaks in Bradenton Without Demolition
Picture this: You wake up one morning to a water bill that’s doubled for no obvious reason. Maybe the floors feel slightly warm in one spot. Or you notice a faint musty smell that wasn’t there last week. If you’re a homeowner in Bradenton, FL — where homes built on concrete slabs are basically the norm — that combination of symptoms has a name. And it’s one that makes a lot of homeowners start mentally calculating how much their emergency fund holds.
Slab leaks.
Here’s the thing, though. Not too long ago, fixing a slab leak meant one thing: breaking your floor open. Jackhammers, dust, weeks of disruption, and a bill that could easily run $10,000–$30,000 or more. But that’s not the only path anymore.
Trenchless pipe repair in Bradenton, FL has quietly changed the game for homeowners facing exactly this situation — and most people have no idea it exists until they’re already staring down a demolition estimate.
So let’s talk about what it actually is, how it works, and whether it might be the right move for your home.
What You’re Actually Up Against: The Slab Problem in Bradenton
Most homes in Bradenton were built on concrete slab foundations. It’s common in Florida — the soil, the water table, the building traditions all make it a practical choice. But when pipes run beneath that concrete and something goes wrong… well, that’s when things get complicated.
Pipes under slabs can fail for all kinds of reasons: corrosion (especially in older copper lines), shifting soil, tree roots, or just the slow wear of hard Florida water over decades. When they start leaking, that water has nowhere to go except into the ground or upward through your slab.
And because the leak is hidden under concrete, it can go on for months before you notice anything obvious.
[IMAGE: Cross-section diagram showing water pipes running beneath a concrete slab foundation, with a visible leak point and water seeping upward]
The traditional fix? Jackhammer through the floor, dig down to the pipe, replace it, patch the concrete, re-install flooring. It works. But it’s brutal — on your home, your daily life, and your wallet.
That’s why trenchless technology matters so much here.
What Is Trenchless Pipe Repair, Exactly?
Trenchless pipe repair is exactly what it sounds like: fixing or replacing your pipes without digging trenches through your floor or yard.
There are two main methods used for slab situations:
Pipe lining (also called CIPP — Cured-In-Place Pipe): A technician inserts a flexible liner coated with resin into your existing pipe. It’s inflated, pressed against the interior walls, and then cured — essentially creating a brand-new pipe inside your old one. The damaged pipe becomes the mold.
Pipe bursting: A new pipe is pulled through the old one, which fractures and displaces outward as the new pipe passes through. You end up with a completely new line, same route, no trench.
Both methods typically require only small access points — sometimes just a cleanout opening or a couple of small holes rather than tearing up your entire floor.
[IMAGE: Side-by-side comparison showing traditional open-cut slab excavation vs. small access point used in trenchless repair]
Honestly, the first time most homeowners hear about this they’re a little skeptical. “That sounds too easy.” But this technology has been used in commercial and municipal plumbing for decades — it’s just finally become widely available for residential applications.
Step-by-Step: How Trenchless Pipe Repair Actually Works in Your Home
Here’s what the process typically looks like when you’re dealing with a slab leak in Bradenton. I want to walk you through this concretely, because “trenchless repair” can sound vague until you understand the actual steps.
Step 1: Diagnosis — Finding the Leak Without Guessing
Before anything else, a good plumber will use non-invasive detection to locate the leak. This usually involves:
- Acoustic leak detection — specialized microphones that pick up the sound of water escaping under pressure
- Pressure testing — isolating sections of your plumbing to narrow down where pressure drops
- Video camera inspection — a small camera snaked through your pipes to visually inspect the interior condition
This step is critical. You don’t want anyone swinging a jackhammer before they know exactly where the problem is. A precise location saves you from unnecessary damage and helps determine which repair method is appropriate.
[IMAGE: Plumber using electronic leak detection equipment on a Bradenton home’s floor, with readout display visible]
What to expect: This typically takes a few hours. You’ll end up with a clear picture of not just where the leak is, but the overall condition of your pipe system — which matters a lot for deciding between repair and full replacement.
Step 2: Assessing Whether Trenchless Is the Right Fit
Not every situation is a candidate for trenchless repair. Here’s the honest truth: if your pipes have collapsed, have multiple failure points spread across different lines, or the pipe interior is too deteriorated to hold a liner, traditional repair may still be necessary.
But in most cases — especially for single leak points or a section of deteriorating pipe — trenchless works well.
Your plumber should walk you through:
- The condition of the pipe (video footage helps here)
- Which method (lining vs. bursting) fits your pipe size and material
- Access requirements — where the small entry points need to be
- A realistic cost comparison between trenchless and traditional
If someone’s pushing you toward jackhammers without at least discussing trenchless as an option, that’s worth a second opinion.
Step 3: Preparing Access Points
This is where the “less invasive” part really shows up in practice.
For pipe lining, the plumber often works through existing cleanout ports or cuts a small access hole — sometimes just 12 inches square — to feed equipment into the system. For pipe bursting, two small pits are typically dug: one at the entry point, one at the exit.
Compare that to traditional slab repair, which might involve cutting a trench 2–3 feet wide across a significant portion of your floor.
[IMAGE: Small cleanout access point being used to insert pipe lining equipment, showing minimal floor disruption]
Pro tip: Take photos before any work starts. Document the condition of your floors, walls, and any finishes near the work area. Good contractors do this automatically, but it’s smart to have your own record.
Step 4: The Actual Repair
For pipe lining: The liner — a fabric tube saturated with epoxy resin — is pulled or pushed into position inside your damaged pipe. It’s then inflated with air or water pressure, pressing it firmly against the pipe walls. UV light or steam is used to cure the resin, hardening it into a smooth, seamless new pipe surface. The process takes a few hours, plus curing time.
For pipe bursting: A bursting head attached to the new pipe is pulled through the old one by a hydraulic machine at the exit point. The old pipe fractures outward. The new pipe — usually HDPE, which is incredibly durable and corrosion-resistant — slides into place. This method is faster for longer sections and results in a completely new pipe rather than a repaired one.
Either way, the actual repair work is often completed in a single day.
Step 5: Testing and Restoration
Once the repair is done, the system gets pressure-tested to confirm there are no remaining leaks. The small access points are patched and sealed. If any flooring was disturbed, a good contractor will restore it — though the area affected is dramatically smaller than traditional demolition.
You’re typically back to full water service the same day or the next morning.
What This Looks Like Cost-Wise (Real Talk)
Trenchless repair isn’t free. Pipe lining for a slab section might run $3,000–$8,000 depending on the length and complexity. Pipe bursting can range similarly.
But compare that to traditional slab repair: you’re looking at the plumbing work plus concrete breaking and patching plus flooring restoration — tile, hardwood, carpet, whatever’s on your floor. When you add it all up honestly, trenchless often costs the same or less, and it preserves your home’s finish work.
There’s also the disruption factor. Traditional slab repair can take 3–7 days minimum, sometimes longer. Your kitchen or bathroom might be completely out of commission. With trenchless, most households are functional again quickly.
Troubleshooting: Questions Homeowners Usually Have
“How do I know the liner will last?” CIPP liners are typically rated for 50+ years. They’re smooth on the interior (actually better flow than old corroded pipe), resistant to root intrusion, and don’t corrode. Studies on commercial installations going back decades show strong performance.
“What if my pipes have multiple problems?” That’s actually a reason to consider trenchless, not against it. A full pipe lining treats the entire length of a section — so even if you only found one active leak, the liner addresses the surrounding wear simultaneously.
“My neighbor said trenchless doesn’t work on clay pipes — is that true?” Trenchless works on a variety of materials including cast iron, copper, clay, and PVC. What matters more is the pipe’s current condition and diameter. A camera inspection will tell you quickly whether your specific pipes are candidates.
“Can my HOA say no?” Since trenchless work happens inside your home or below your yard with minimal surface disruption, HOA issues are rare. But it’s worth checking your documents if you have any concerns.
Expert Tips Worth Knowing Before You Call Anyone
A few things I’d want a close friend to know before navigating this:
Get the camera inspection footage. Any reputable plumber doing trenchless work should show you the before-and-after video of your pipes. If they won’t, or don’t have the equipment, keep looking.
Ask about the warranty. Both the repair method and the materials should come with warranties. CIPP installations typically carry 10-year workmanship warranties; materials are rated much longer.
Don’t let urgency push you into skipping comparison. Slab leaks can feel like emergencies (and sometimes are, if water is actively damaging your structure). But in most cases you have 24–48 hours to get a second opinion before making a major decision.
The brand of liner material matters. Not all epoxy resins are equal. Ask what brand/product they’re using and look it up. Reputable contractors use products with established track records.
If you’re already at the point of getting estimates and want to understand what trenchless pipe repair in Bradenton specifically looks like for your home’s situation, talking to a local specialist who knows Florida’s soil conditions and local building codes is worth a lot more than a generic estimate.
Summary: What You’re Really Choosing Between
Here’s the bottom line, laid out plainly.
Traditional slab repair gives you full access to the pipe, which in rare cases is genuinely necessary. But it costs more when you factor in all the restoration work, takes longer, and leaves your home significantly disrupted.
Trenchless pipe repair — whether lining or bursting — handles the same underlying problem with a fraction of the disruption. It’s been proven in commercial applications for decades. For Bradenton homeowners dealing with the combination of aging pipes and slab foundations, it’s often the smarter path.
The most important move you can make right now is getting a proper diagnosis. If you suspect a slab leak — weird water bills, warm spots on your floor, unexplained moisture or mildew smell — don’t wait. The longer a slab leak runs, the more potential damage to your foundation and your home’s interior.
Getting a professional assessment doesn’t lock you into anything. It just gives you real information to make a good decision. And in this situation, information is everything.
[IMAGE: Bradenton FL homeowner speaking with plumber, reviewing pipe camera footage on a tablet — before/after comparison of pipe interior]
Have questions about whether trenchless repair is right for your specific situation? Reach out to a Bradenton trenchless pipe repair specialist for an honest assessment — no pressure, just answers.


Comments are closed